Help
Invite or create a user
How to add someone to VIPA. Button names match the English UI.
This is done by Allura staff with user-management permission (for example a platform administrator). If you do not see the buttons, that account cannot invite or create.
The person you add finishes first-time setup on their own. That flow is in How to sign in.
Before you start
- You are signed in to VIPA (email, password, and the 6-digit code if asked).
- You have the person’s work email.
- You know whether they are Allura staff (platform) or someone at a channel organization (distributor, dealer, and so on).
- If they are channel, that organization must already exist in VIPA.
Open Users
Users is not in the platform Home menu. Open administration first:
- In the platform left sidebar, click Settings.
- In the administration menu, click Users.
- You will see the title Users and Create, invite, and manage identities.
- At the top right (next to the All, By role, By department, By organization tabs) are:
- Invitation control
- Create user
- Invite user
On By role, after you pick a role, the buttons may read Invite user with this role / Create user with this role. On By organization, after you pick a tenant: Invite user for this organization / Create user for this organization. The form opens with those values filled in.
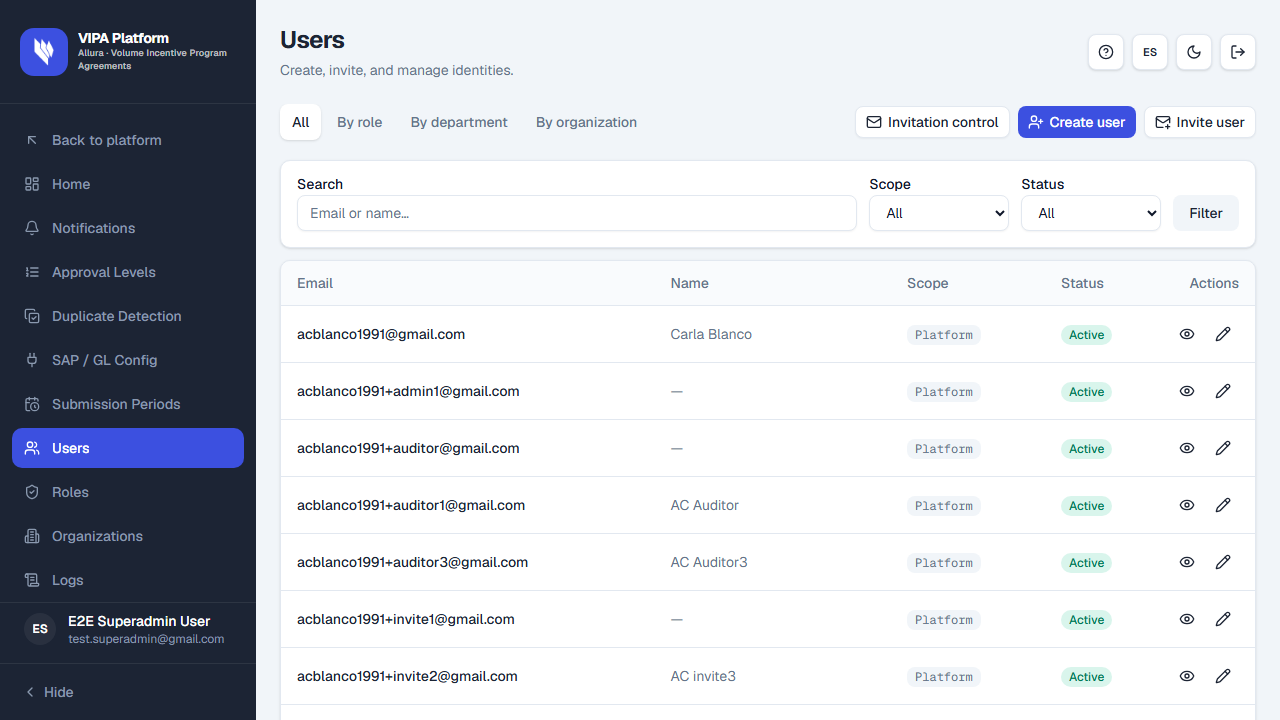
Below the buttons: Search (Email or name…), Scope and Status (usually All), and Filter. The table: Email, Name, Scope (Platform / Organization), Status (Active, and so on), and Actions.
Invite or create?
| Use | When | What happens |
|---|---|---|
| Invite user | The usual path. They set their own password from the email. | VIPA sends a link. It expires in 24 hours. |
| Create user | You need an account ready now (tests, or you will hand them a password). | You set the password. They sign in and, if you left the box checked, change it on first access. |
If you are unsure, invite. Then you are not sharing a password over chat or email.
Invite user
Click Invite user. Title Invite user. You will see Supabase sends an email link so the user can set their password. (they still get an email with a first-access link).
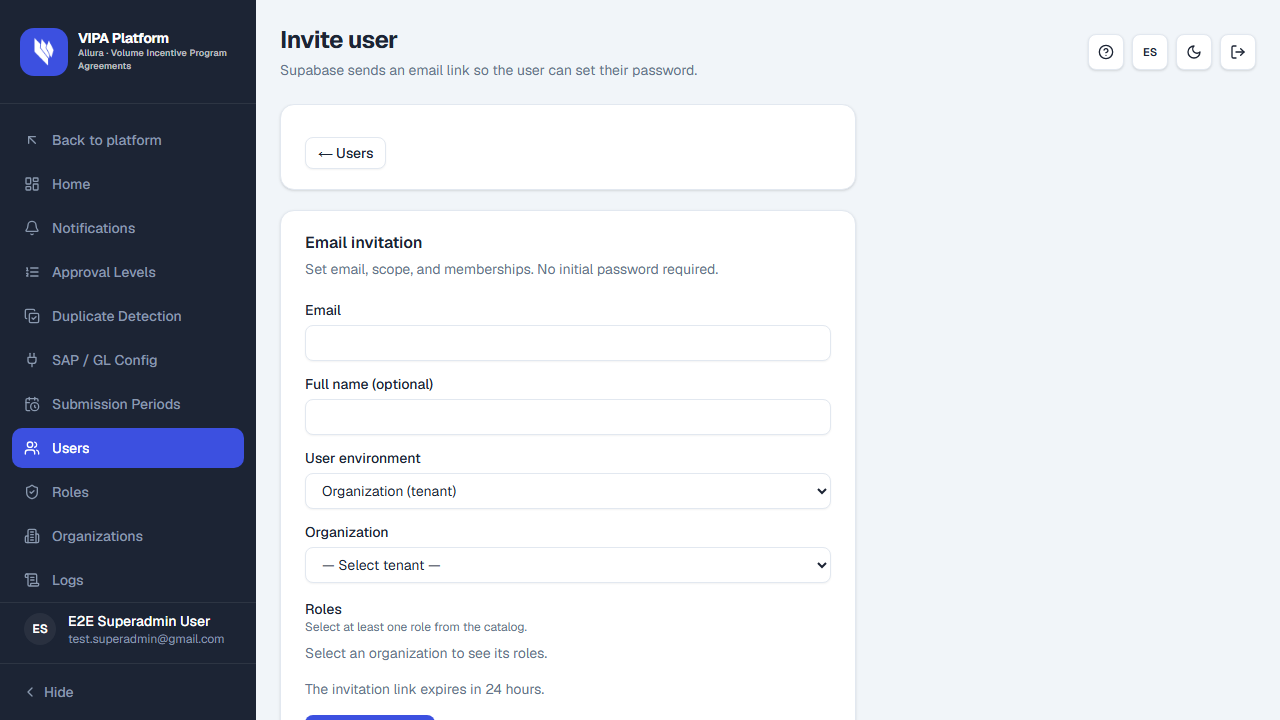
In the Email invitation card (Set email, scope, and memberships. No initial password required.):
- Email — their address.
- Full name (optional) — if you leave it blank, VIPA asks for it during first-time setup.
- User environment — when the form opens it is usually Organization (tenant) (as in the screenshot). Switch to Platform (staff) if you are inviting Allura staff. For channel, pick Organization from — Select tenant —.
- Roles — check at least one. The hint reads Select at least one role from the catalog. If this is an organization and you have not picked a tenant yet, you will see Select an organization to see its roles.
- Below: The invitation link expires in 24 hours.
- Click Send invitation. While it runs, the button reads Sending…
On success you see Invitation sent successfully and the person’s profile opens.
Ask them to check email (including spam) and open the link on the same device they will work on. If the link expires, resend from Invitation control (below). Do not reuse a link that was already opened.
Create user
Click Create user. Title Create user. You will see Register with password. The user can sign in immediately if the email is confirmed.
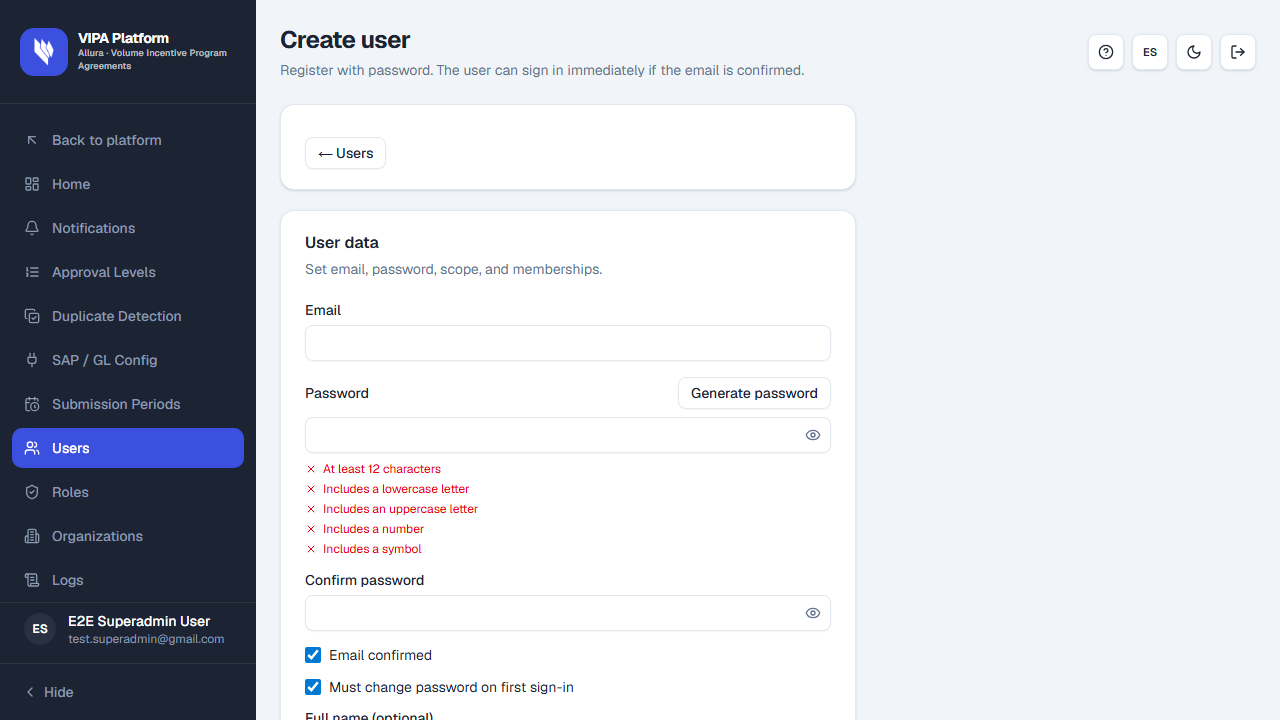
Under User data (Set email, password, scope, and memberships.) fill in:
- Password and Confirm password — the same rules as elsewhere in VIPA (at least 12 characters, uppercase, lowercase, number, and symbol). Generate password creates one that meets the rules; copy it if you will hand it over.
- Email confirmed — usually already checked. They can sign in without an extra confirmation step.
- Must change password on first sign-in — usually already checked. Leave it on if you are giving them a temporary password.
- Full name (optional), User environment, Organization if needed, and Roles (same as invite).
- Click Create user. While it runs, the button reads Creating…
On success you see User created successfully and the profile opens.
Give them the email and password through a secure channel. First-time setup (change password if asked, name, MFA) is in How to sign in.
On the user profile
After invite or create, VIPA opens that person’s profile. There, if your permission allows, you can:
- ← Users — back to the list.
- Edit — Full name (optional), User environment, Organization if needed, and Active user.
- Actions: Ban / Unban, Confirm email, Recovery (confirm Send recovery link? with Send link), Reset MFA (if they already have MFA and it is not you; confirm Reset MFA?).
- Password — Set password (takes effect immediately; they must change it at the next sign-in).
- Roles (RBAC) — Assign role (list Select a role…) / Revoke.
If the email already existed, do not create another: open them in the list and use Recovery, or Resend in Invitation control.
Invitation control
From Users, click Invitation control.
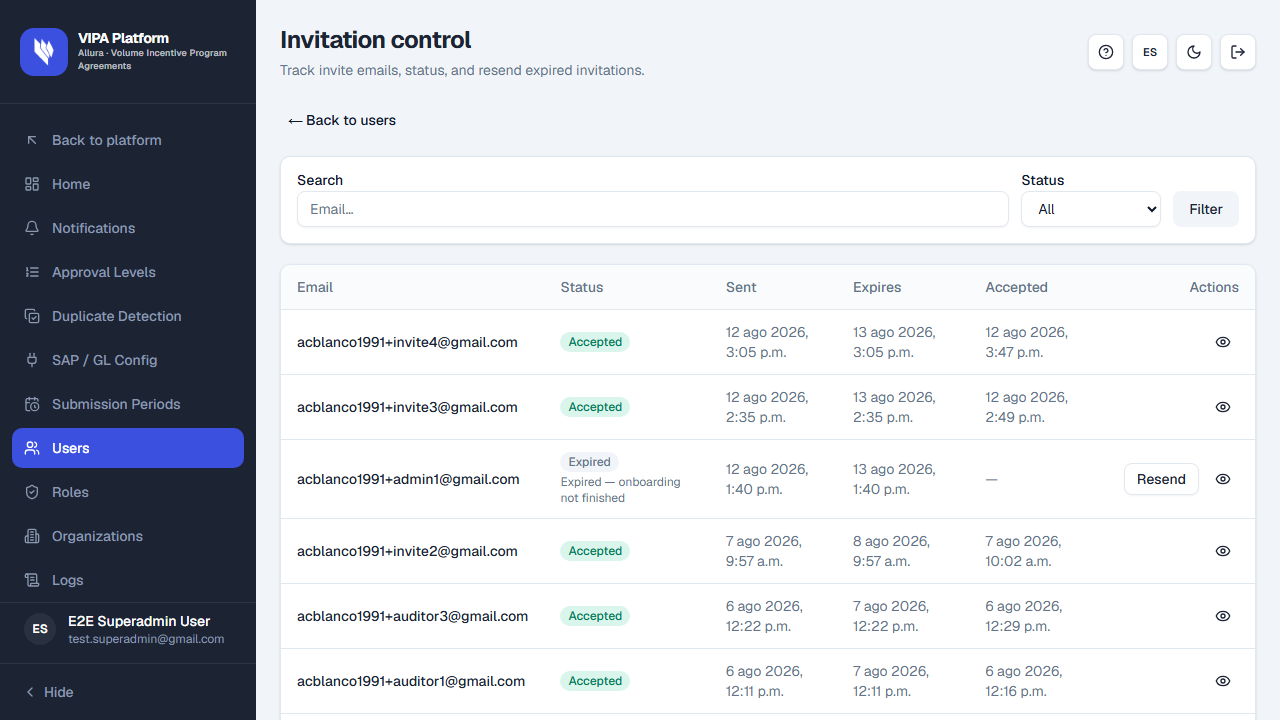
You will see Track invite emails, status, and resend expired invitations.
Filters (same pattern as Organizations: there are no status tabs):
- Search — Email… Then Filter.
- Status — All, Pending, Consumed, Accepted, Expired (applies as soon as you pick one).
- Clear filters if you applied a search or status.
The table: Email, Status, Sent, Expires, Accepted, Actions. An expired row may show Expired — onboarding not finished (or another reason).
| Status | Meaning |
|---|---|
| Pending | Sent; they have not opened the link (or not finished). |
| Consumed | They opened the link; onboarding may still be in progress. |
| Accepted | First-time setup is done. |
| Expired | The link was not used in time, onboarding was not finished, or an admin canceled it. |
On the row (or the detail page):
- Resend — a new email when a fresh link is needed. Sometimes you will see The user can continue onboarding by signing in — no new email was sent. Tell them to use Sign in, not to look for another message.
- Cancel — the invite is marked expired and they cannot get in until a resend. Confirm with Cancel invitation.
- Delete — hides a pending invite that nobody opened. To add them again, use Invite user.
← Back to users returns to the list.
If something goes wrong
| What you see | What to do |
|---|---|
| You do not see Invite user or Create user | Your role does not allow it. Ask a platform administrator. |
| A user with that email already exists. | Search Users. Do not create another: resend the invite or use Recovery on their profile. |
| You do not have permission for that operation. | The environment or role you picked is not allowed for you (for example, not everyone can assign Superadmin). |
| No email arrives | Check spam. The link lasts 24 hours: use Resend. Locally, mail sometimes only reaches team test addresses. |
| Auth email rate limit reached… | Wait a while and try again. |
| They say the link does not work | It expired or was already used. Resend, or have them sign in if onboarding was left unfinished. |
| Select an organization to see its roles. | Under Organization (tenant), pick the tenant first. |
| No roles available for this selection. | That tenant has no roles yet, or your account cannot assign them. Ask an administrator. |
There is no public “Sign up”: if someone is not in Users, invite or create them here.